Are the household gadgets and appliances you rely on daily underperforming? If the drip of your coffee machine is looking a little meek or your hair dryer isn’t blowing as powerfully as you’d like, it may be time to clean your appliances. The tools we rely on daily are often the ones we forget to take care of, but without regular maintenance you’ll find yourself having to replace appliances way too often.
Popular gadgets such as coffee machines, hair dryers, air fryers, vacuum cleaners and blenders are all prone to looking a little shabby without proper care and benefit from regular cleaning. Spend a little time giving them the once over and it can save you money in the long run as they’re more likely to last.
For the best way to clean your everyday gadgets, follow advice from ITV This Morning’s homecare expert and author of The 15 Minute Clean, Lynsey Crombie. Here she shares her expert tips on how best to care for popular appliances.
Clean the inside of your air fryer with less effort

(Image: © Shutterstock)
The advent of the air fryer has transformed the way we cook – saving us time and, in some cases, money off our energy bills. But without knowing how to clean your air fryer, even the best air fryers can suffer. You don’t need to use as much oil in an air fryer as you would in a traditional oven, but the oil you do use can stick to your basket and grills and tarnish your air fryer if not cleaned after each use.
To keep your air fryer looking its best, Lynsey Crombie is a fan of using silicone liners inside, which you can remove and clean after each use. “Popping these in your air fryer will protect the grills and basket and save your air fryer getting a build-up of grease and grime,” she says. Cleaning your air fryer regularly after each use can be done in a few simple steps:
- Unplug your air fryer and remove the basket and any other removable bits that can be washed and soaked or even put in the dishwasher.
- Use a damp microfibre cloth to clean the inside grill.
- To clean the main tray, sprinkle it with baking soda, add some hot water and a drop of dish soap. Leave to soak for at least 15 minutes. Together these products will break down the grease and grime.
- Empty the water and thoroughly rinse and dry before putting the unit back together.
Improve your vacuum’s suction performance

(Image: © Shutterstock / Boyloso)
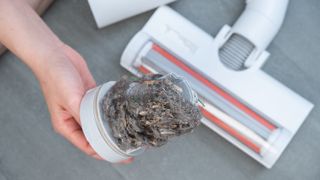
Whether you use one of the best cordless vacuum cleaners, a robot vacuum cleaner or a cylinder vacuum, you’ll need to keep the suction head free from trapped dirt and regularly empty its dust chamber to ensure it works its best. Even designs with anti-hair wrap technology from the likes of Shark or Dyson need regular attention to keep them in good condition and maintain the effectiveness of their suction. If you own a Dyson you may want to follow our advice on how to clean a Dyson vacuum, but for general maintenance of your vacuum, the advice from Lynsey will work across the board – regardless of which vacuum brand you own.
“To clean your vacuum, remove the brush roll and take out any debris that is wrapped around it or stuck,” she says. “If the brush roll doesn’t remove, use scissors to cut away any hair. If it can be removed, you can give the brush roll a wash with some warm soapy water, but you’ll need to leave it to dry sufficiently before placing it back in. Check the user manual to check it can be washed before doing this, however. Take out the filter and wash it with warm soapy water and leave flat to air dry on a window sill.
“If you have a blockage in the pipe, use a wire coat hanger to give it a poke and remove anything that’s stuck. Once all dry, put it back together and you should instantly notice a big difference in the suction performance.”
Make your old coffee maker brand new again

(Image: © Future)
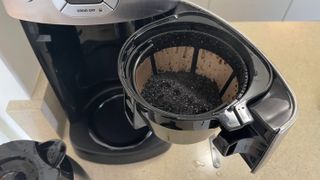
The best coffee machines including drip coffee makers, espresso machines and pod coffee machines all need to be taken care of to ensure they can take care of us when we need that all important sip of caffeine. There’s nothing worse than waiting for your coffee in the morning only to find the drip of your machine slowly grinds to a halt, after all. If this happens, it’s likely that your coffee machine needs descaling to get things flowing freely again.
A sobering thought, but research conducted by public health and safety organisation NSF International suggests that coffee makers can harbour two times more bacteria than a toilet seat. The warm and damp environment inside a coffee machine can be a breeding ground for bacteria and mould, which is why it’s essential to keep on top of regular cleaning.
“If you live in a hard water area, coffee machines need descaling roughly after every 30 uses,” says Lynsey. “Fill the water tank with half water and half white vinegar and run a brew cycle. This will allow the vinegar to clean the internal parts too. Once the cycle has finished, allow it to sit for about 15 minutes and then run a rinse cycle. Clear the tank and just use plain water to run a further cycle to ensure all the vinegar has gone. Then soak any removable bits such as the drip filter or used pod container in warm soapy water to clean them. Clean the outside of your machine with a soft sponge with warm soapy water and buff dry with a microfibre cloth.”
To clean a steam wand, you can fill a jug with half warm water and half vinegar solution and submerge the wand in the water and let it soak. For more on this read our feature on how to clean a coffee maker.
Care for your blender

(Image: © Shutterstock)
The best blenders can work wonders when you’re in a hurry to whip up pancake mix for breakfast or a protein smoothie post workout. But if the jar isn’t cleaned immediately, ingredients can be stubborn to remove and even dishwashers can struggle to clean dishwasher-safe parts properly. To stop bad odours tarnishing the jar or vibrant ingredients such as beetroot staining it, it’s important to know how to clean a blender to prolong its life. Use a soft bottle brush to ease away any stuck on food pieces inside the jar.
“Clean your blender after every use by half filling the jar with lukewarm water, adding a drop of dish soap and then putting it on a blend cycle,” says Lynsey. “This will help to clean the blades thoroughly, but make sure the water isn’t hot. Rinse and dry before you put it back together.”
Yes, you need to clean your hair dryer

(Image: © Future)
A hair dryer is one of those tools we all take for granted but it’s important to keep it clean so you can achieve salon-style locks at home. The best hair dryers come in all shapes and sizes, but there’s a standard way of cleaning parts to ensure your hair dryer remains powerful. Follow Lynsey Crombie’s simple steps once a week:
- Unplug your hair dryer and allow it to cool.
- Remove the little grill at the back and use a recycled make up brush to remove any hair or debris from the grill parts.
- Wipe over the exterior and cord with a damp cloth and allow it to dry thoroughly before plugging it back in again.

Lysney Crombie is a homecare expert, TV presenter and author of four bestselling books including The 15 Minute Clean. She also produces a range of household cleaning appliances and accessories.
